Welcome to our tutorial on the MVVM design pattern in SwiftUI! In this tutorial, we will explain the important concepts behind MVVM, including its components and how they work together. We will also give you advice and methods for using MVVM in your own projects.
After reading this tutorial, you will have a good understanding of MVVM and how it can assist you in writing simpler, more expandable code for your iOS apps.
Let's begin!
MVVM (Model-View-ViewModel) is a design pattern used to organize the code for a user interface. It is an improved version of the MVC (Model-View-Controller) pattern and helps to better separate the presentation layer of an app from its underlying business logic. This makes it easier to manage the complexity of modern apps and allows for better code reuse and testability.
In summary, MVVM simplifies the process of writing clean, maintainable code for your iOS app.
The MVVM design pattern consists of three main components: the Model, the View, and the ViewModel.
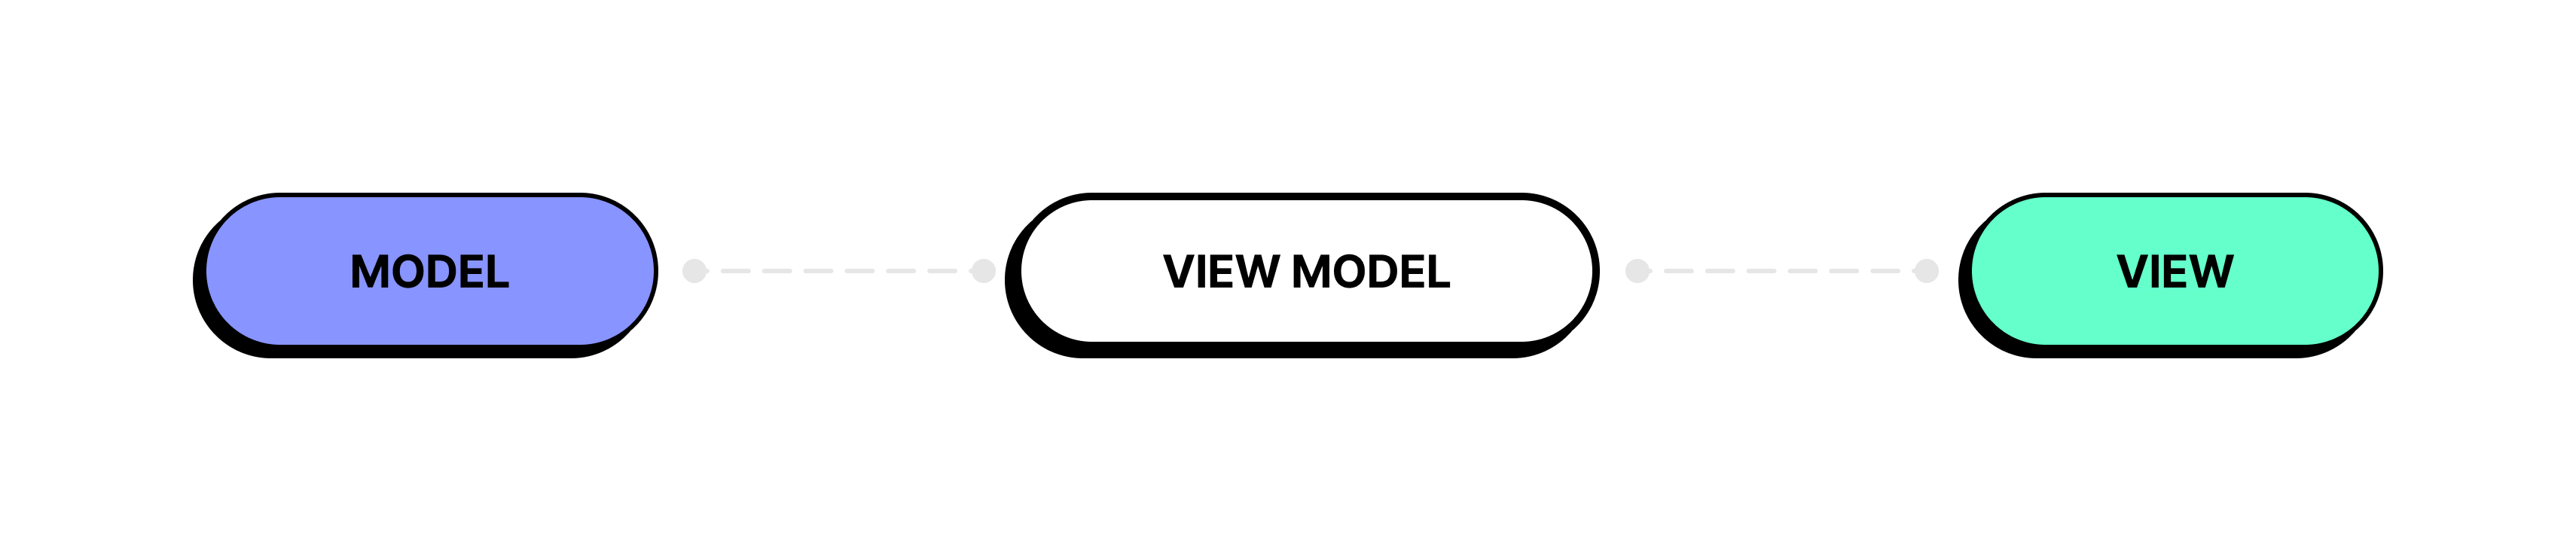
The Model represents the underlying data and business logic of the app. In the context of SwiftUI, it refers to the data that the app is working with, such as user and app data.
The View represents the user interface of the app. It displays the app's content and handles user interactions. In MVVM, the View is declarative and reactive, meaning that it automatically updates whenever the data in the ViewModel changes.
The ViewModel is like a middleman between the Model and View. It shows the data and actions that the View needs, and it manages the communication between the Model and View. The ViewModel doesn't know about the View, and it only works with the data and actions that the View requires to show.
Let's first start with a basic example. This will help us better understand the concepts behind MVVM and how it can be applied to your own projects:
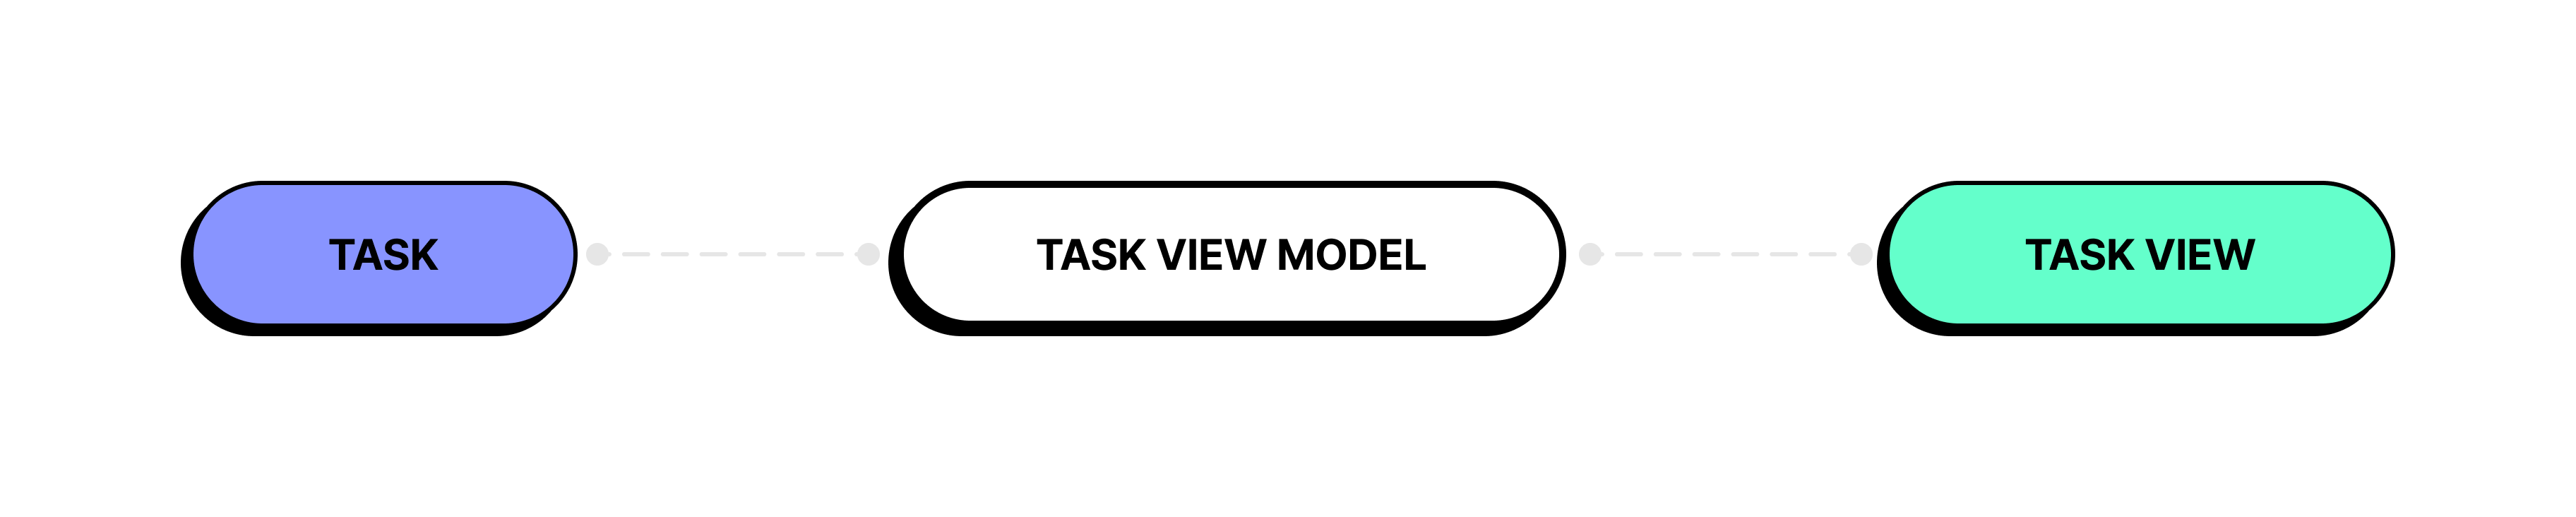
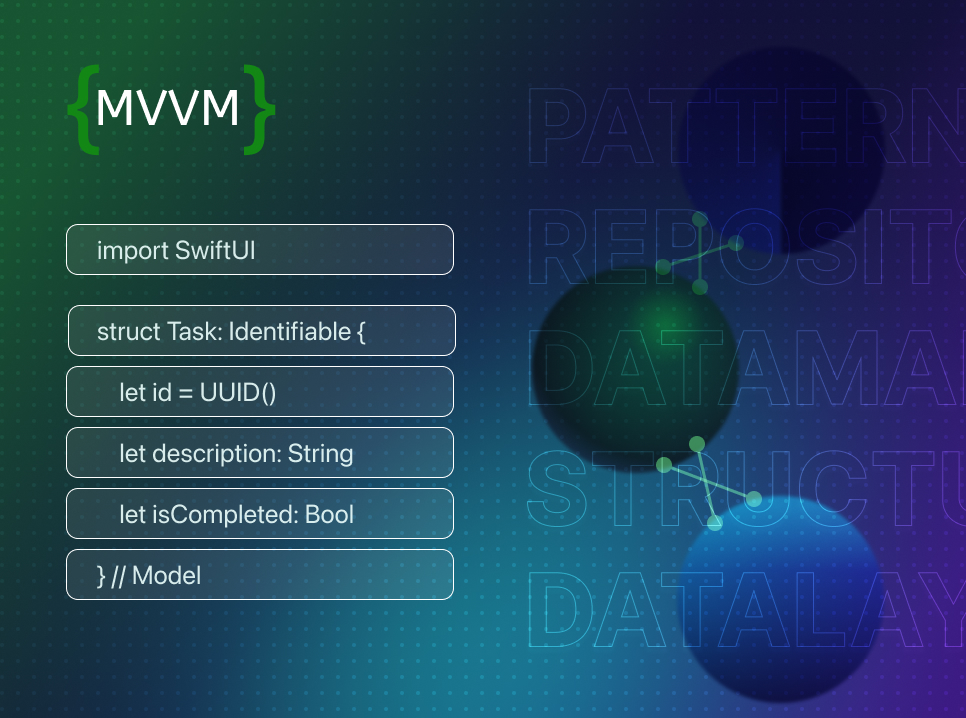
Example defines a struct called Task that represents a task with a description and a Boolean flag indicating whether it is completed.
It also defines a TaskViewModel class that exposes an array of tasks and methods for loading and saving tasks.
Lastly, it defines a View called TaskView that displays a list of tasks and a button to add a new task.
The @ObservedObject property wrapper is used to enable the view to observe changes to the viewModel object.
The @Published property wrapper is used to make the tasks array observable so that changes to it can be published to the view. The onAppear modifier is used to load the tasks when the view appears.
One common way to implement MVVM is by using the Repository pattern to load data from a data source, such as a database or web service.
In this example, it is not necessary to add a Repository, but it could be a good idea for more complex apps.
The Repository pattern abstracts the data access layer of an application and decouples it from the rest of the app. By using a Repository, the ViewModel can interact with it to load and save data, instead of interacting directly with the data source.
Using a Repository can be especially helpful in a complex app with multiple data sources or complex data access requirements. Managing the data access layer directly in the ViewModel can be difficult in such cases, as the ViewModel may have to handle many different data sources and data access operations.
By using a Repository, you can move all of the data access logic out of the ViewModel, which can simplify the ViewModel and make it easier to manage.
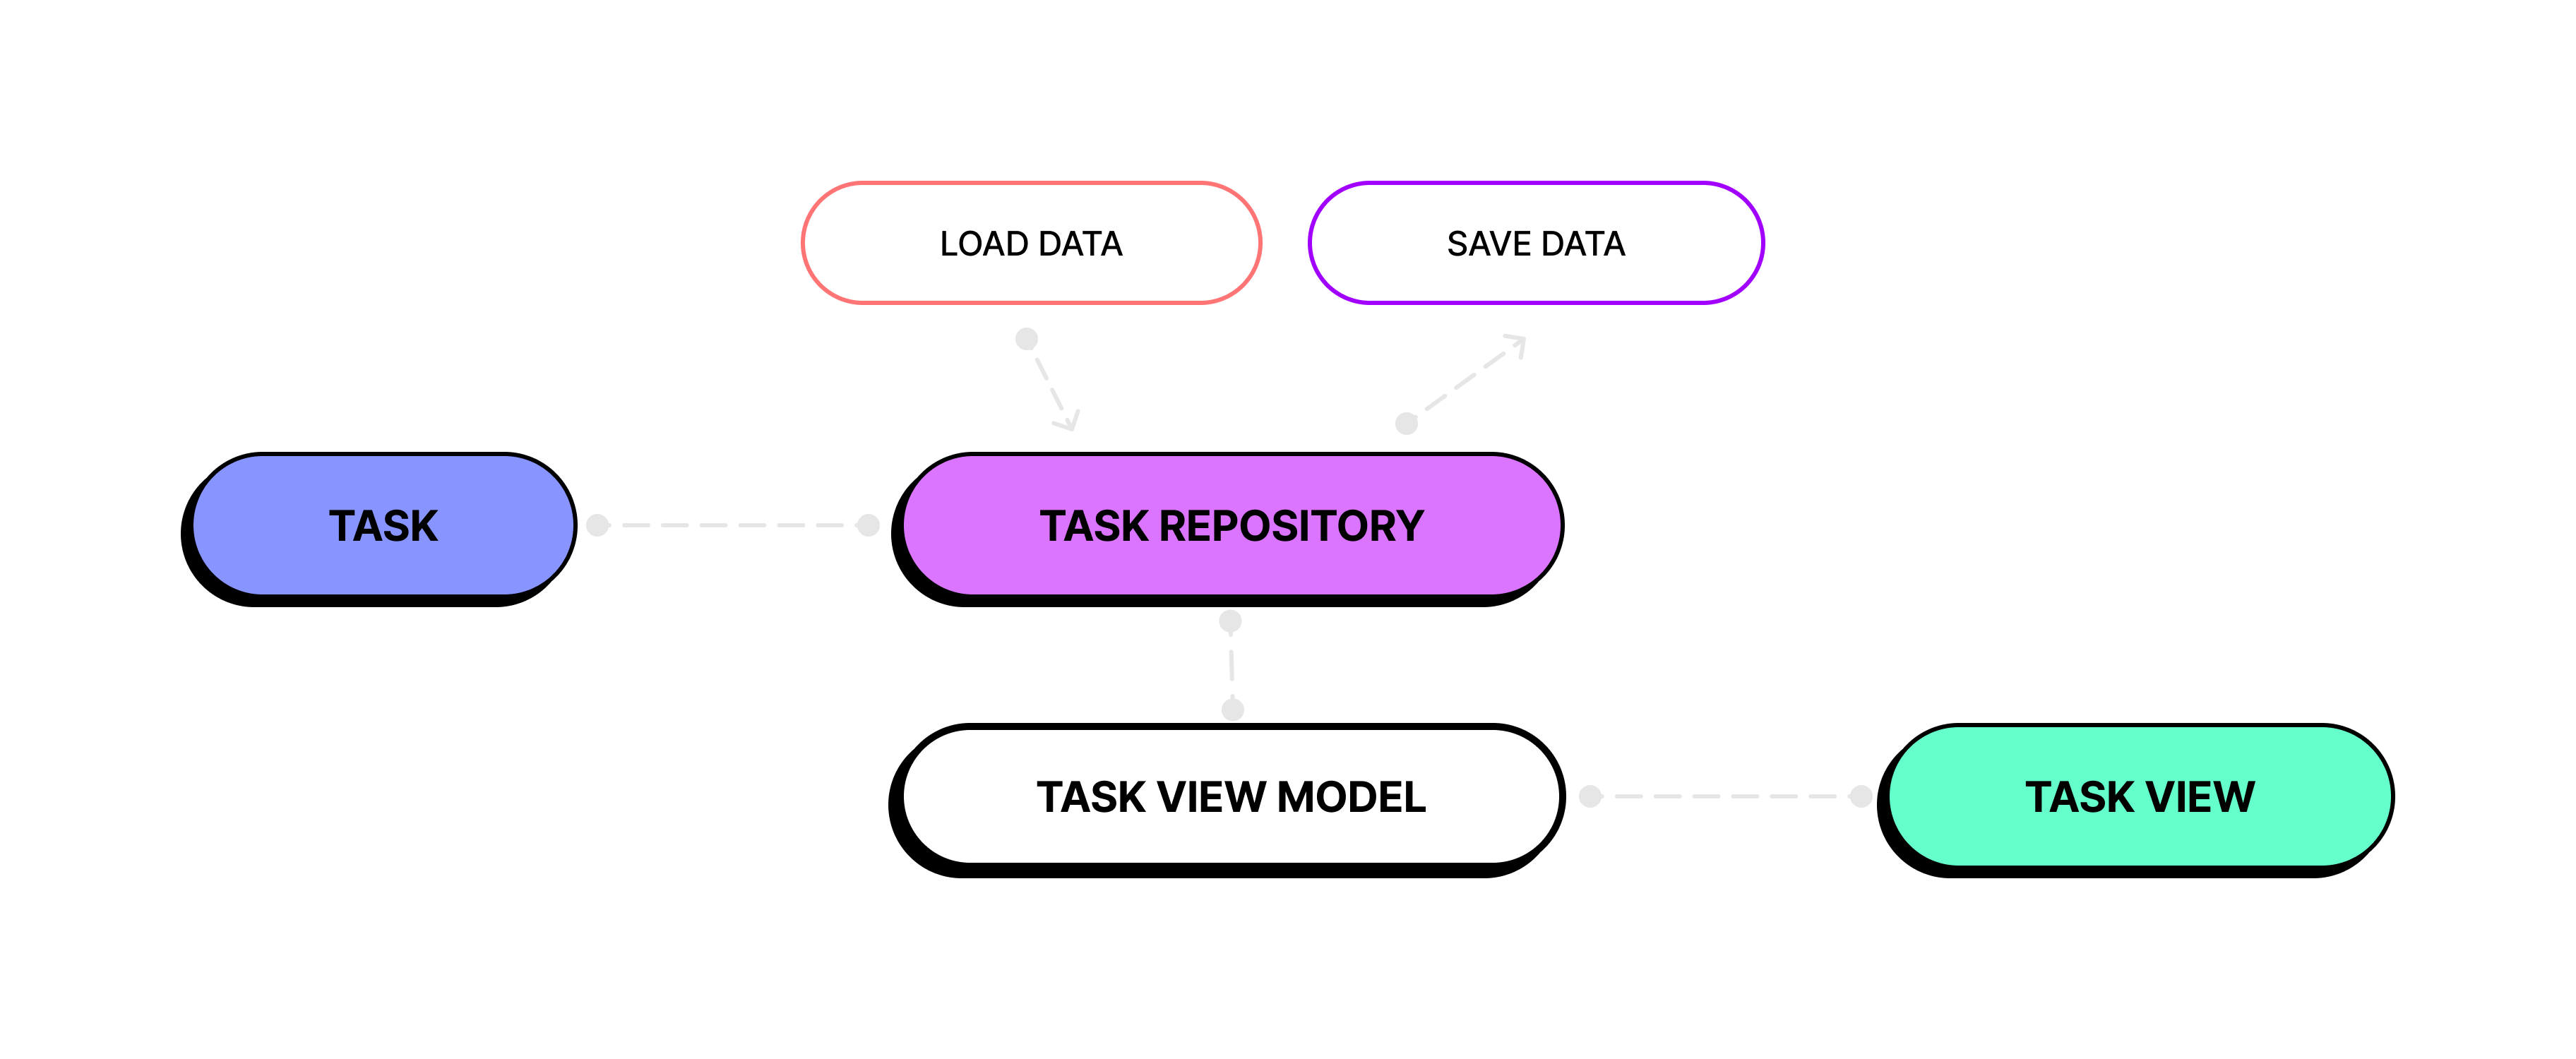
In this example, the TaskRepository class is responsible for loading data from a data source, storing and managing task data, and providing methods for loading and saving tasks. The TaskViewModel exposes the data from the Task model in a way that is easy for the TaskView to consume.
Using a Repository like this is a good fit for the MVVM pattern because it separates data and logic in the app. All data access operations are handled by the Repository, instead of being scattered throughout the ViewModel.
Initializing the Repository in each ViewModel may not be the best approach. To avoid this, you can create a singleton DataManager class that initializes the repositories and provides a reference to them for the ViewModel.
Here is an example of how you can modify your code to use a DataManager singleton:

In this updated example, the DataManager is a singleton that initializes the TaskRepository and provides a reference to it for the TaskViewModel to use. This ensures that only a single instance of the TaskRepository is created, and it can be shared among multiple ViewModel objects.
Overall, using a DataManager as a singleton that initializes Repositories can provide several benefits. This approach ensures that there is only one instance of the DataManager, guarantees that all parts of the application are using the same Repositories, and makes it easier to manage dependencies between different parts of the application.
Here is an example of a DataManager class that can be used to manage the loading of data from multiple sources:
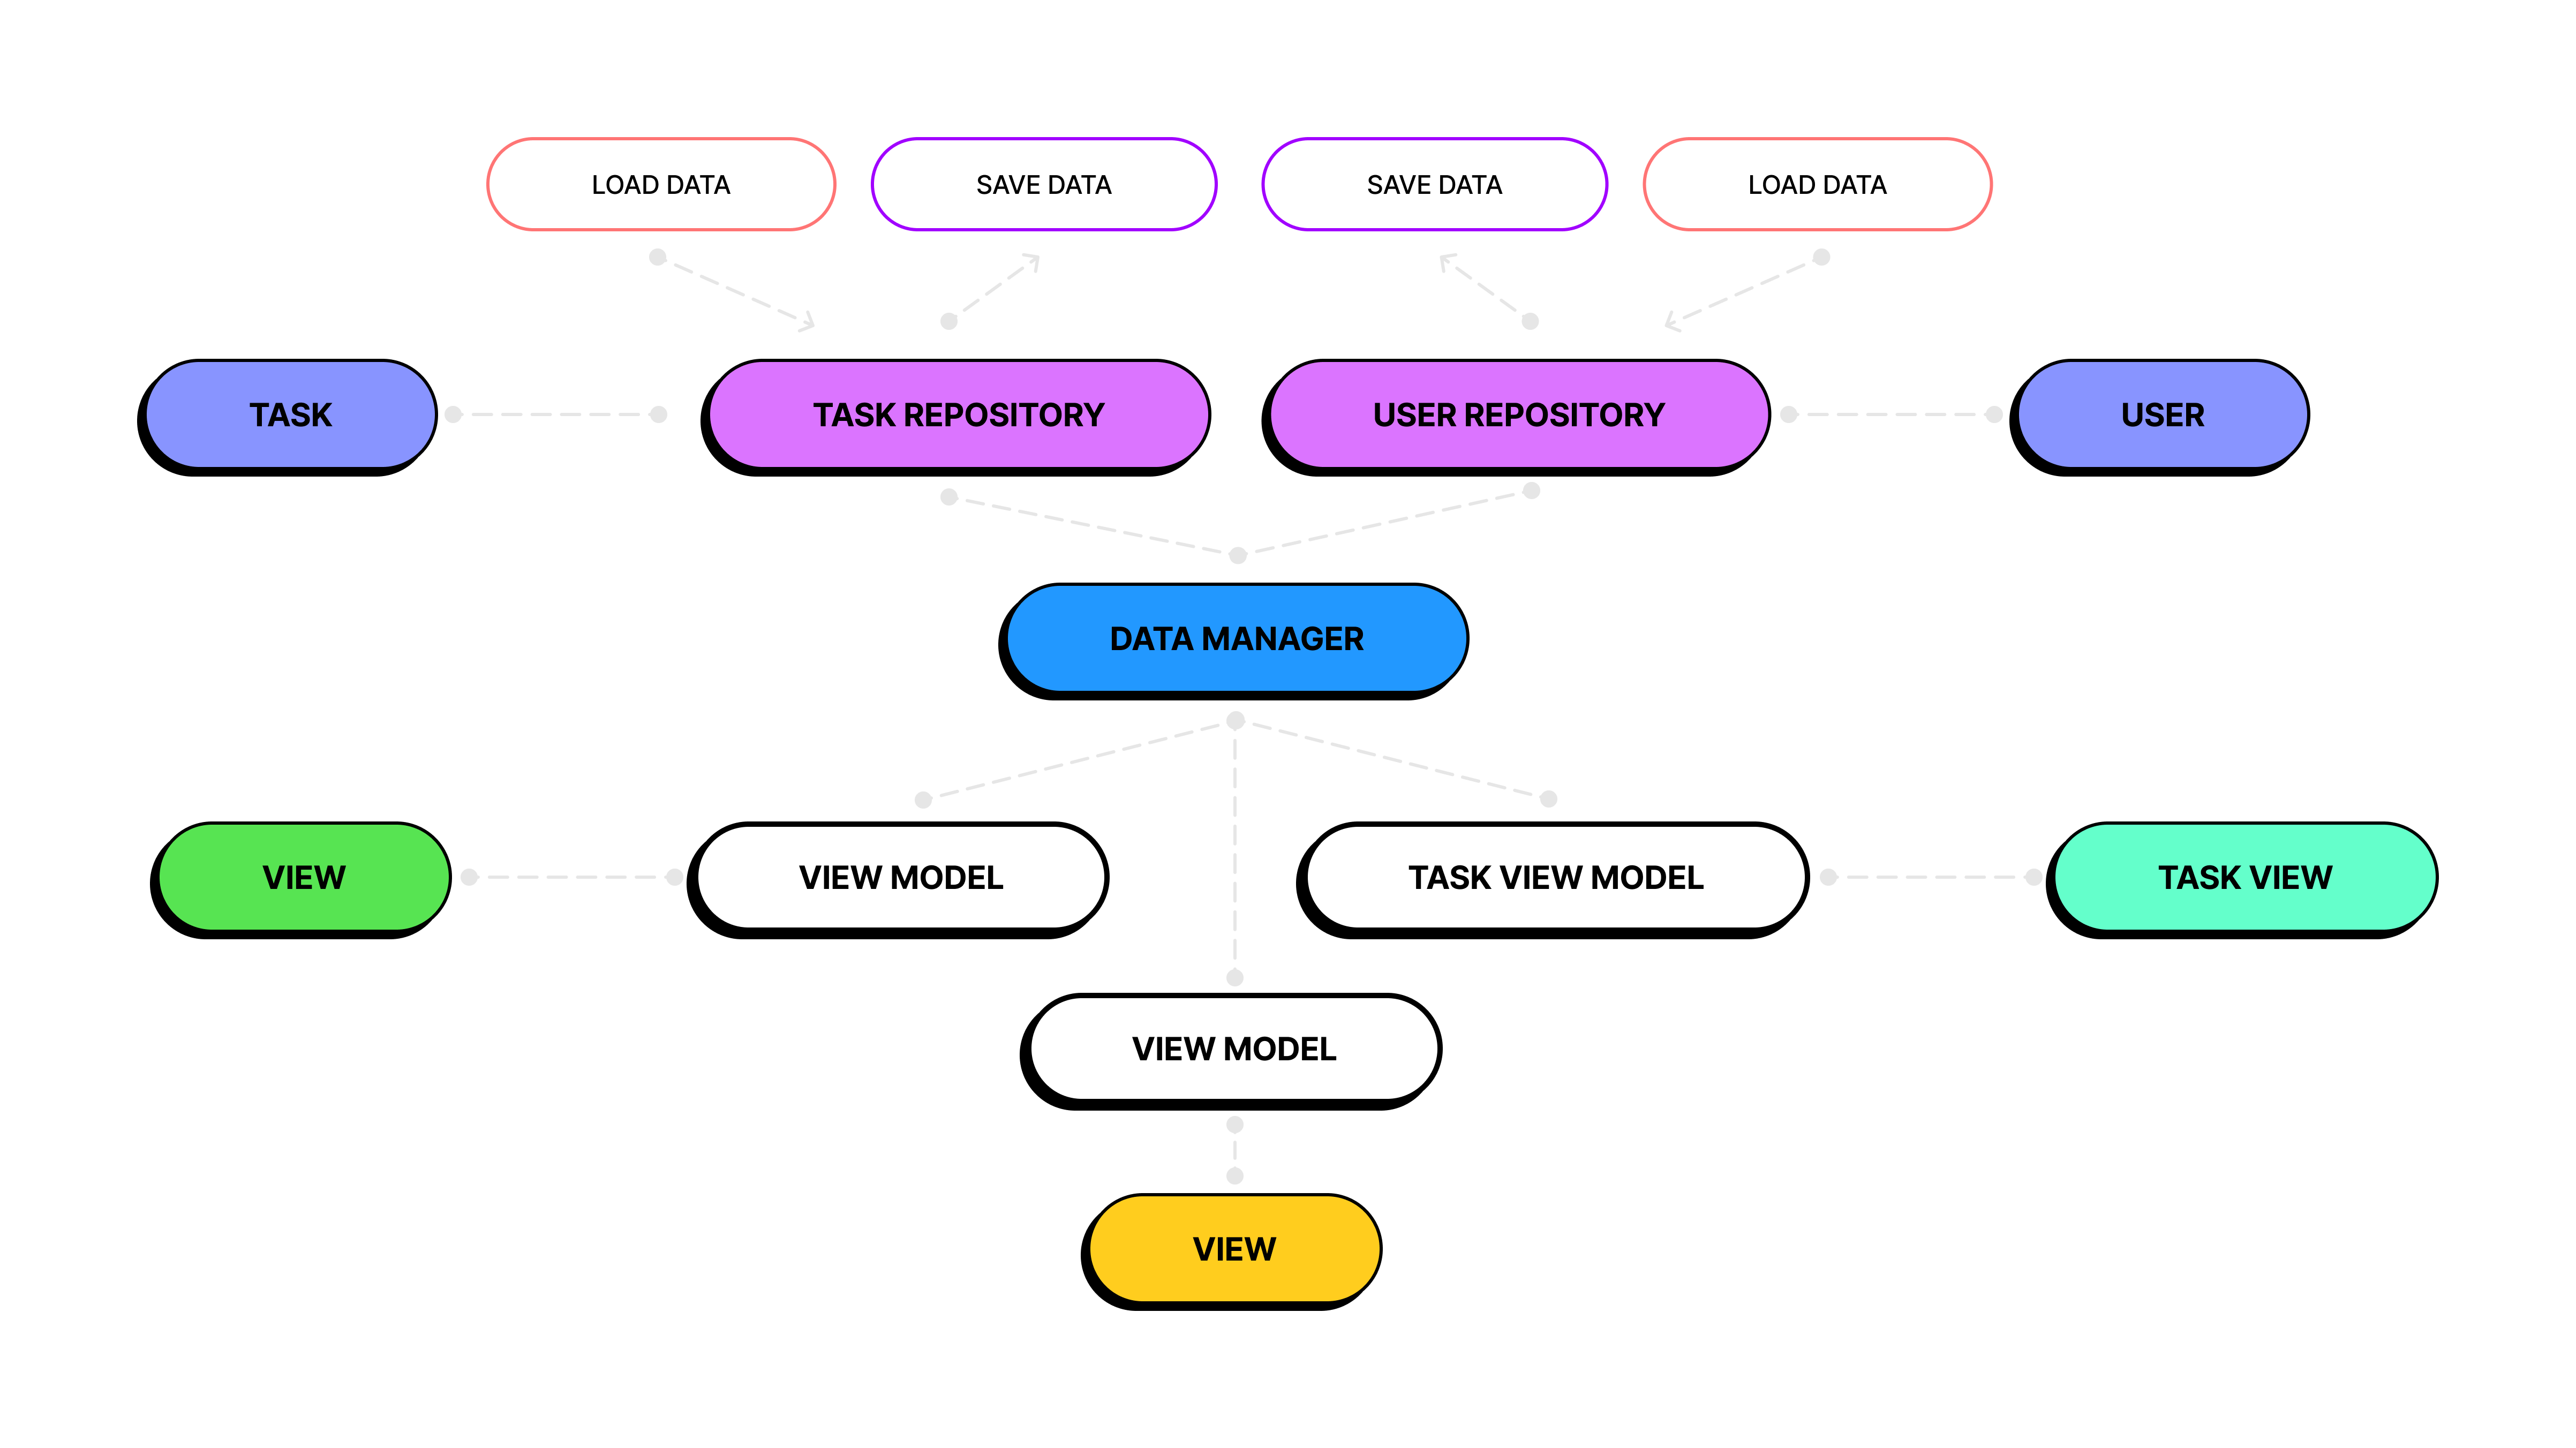
This example demonstrates how DataManager can be used to manage multiple repositories and data sources:
When you add new data sources and repositories, you can simply add them to the DataManager and provide a reference to them for the ViewModel to use.
This approach is especially useful when you have multiple ViewModel objects that need to access the same data sources. By using the DataManager, you can avoid creating multiple instances of repositories and reduce the memory overhead of your application.
In this tutorial, we explored the key concepts behind the MVVM design pattern and how it can help you write cleaner, more maintainable code for your iOS apps. We discussed the components of MVVM, as well as some tips and best practices for applying it to your own projects.
Now that you have a solid understanding of MVVM and how it can help you write cleaner, more maintainable code for your iOS apps, it's important to clearly define the boundaries between the Model, View, and ViewModel layers. Additionally, consider using a Repository and Data Manager for more complex solutions. This will help you better organize your code and avoid confusion or duplication.
Thanks for reading, and see you in the next article! 👋